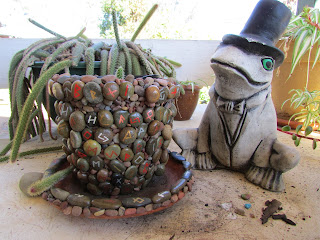
Small Pebble
RUNE Pot
Terracotta pot to be used ...
A selection of Runes to be used ...
* For this project I used small rounded-shaped, different coloured Rune stones
and quirky-shaped tiny pebbles to fit in between the crevices.
* Spreading a small amount of glue at a time,
place each stone to its most comfortable and visual appeal.
* Once your project is totally dry and set (one to two days),
make a weak solution of glue blended with water.
Use a soft bristled paint or craft brush to blend the water and glue mixture,
then brush the solution on all areas of your project,
paying particular attention to the nooks and crannies between each pebble.
Allow to dry for a day or two.
* Using Tile Waterproofing Spray, ensure that all stones are thoroughly covered
and waterproofed, ideal for outdoor use.
Allow to dry.
Finished product ...
**


No comments:
Post a Comment